Note: These steps are primarily for iOS users with version's: iOS 11, iOS 12, & iOS13. If you do not know your current version, you can view this within your "Settings" --> "General" --> "About" and locate the section titled "Software Version." For newer iOS versions 14 and later, please visit the tutorial here.
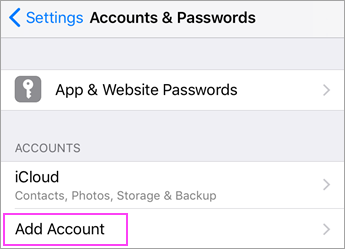
STEP 1
On your iPhone or iPad go to the Settings > scroll down and locate the "Accounts & Passwords" --> Select "Add Account".
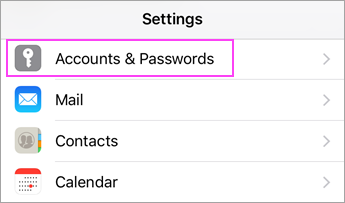
Note: If you're on a older Version of Apple Software this may be a little different. You will need to go to setting app --> "Accounts" then "Add Account".
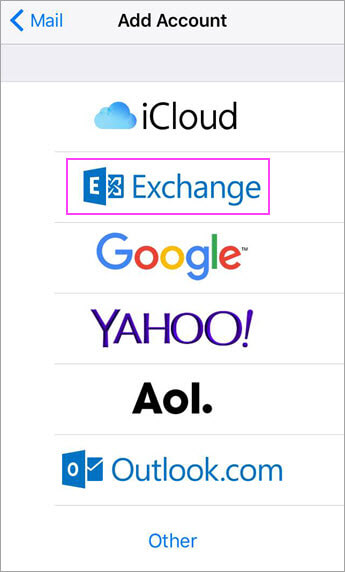
STEP 2
You will be presented with a list of Services from here you will be selecting Exchange
STEP 3
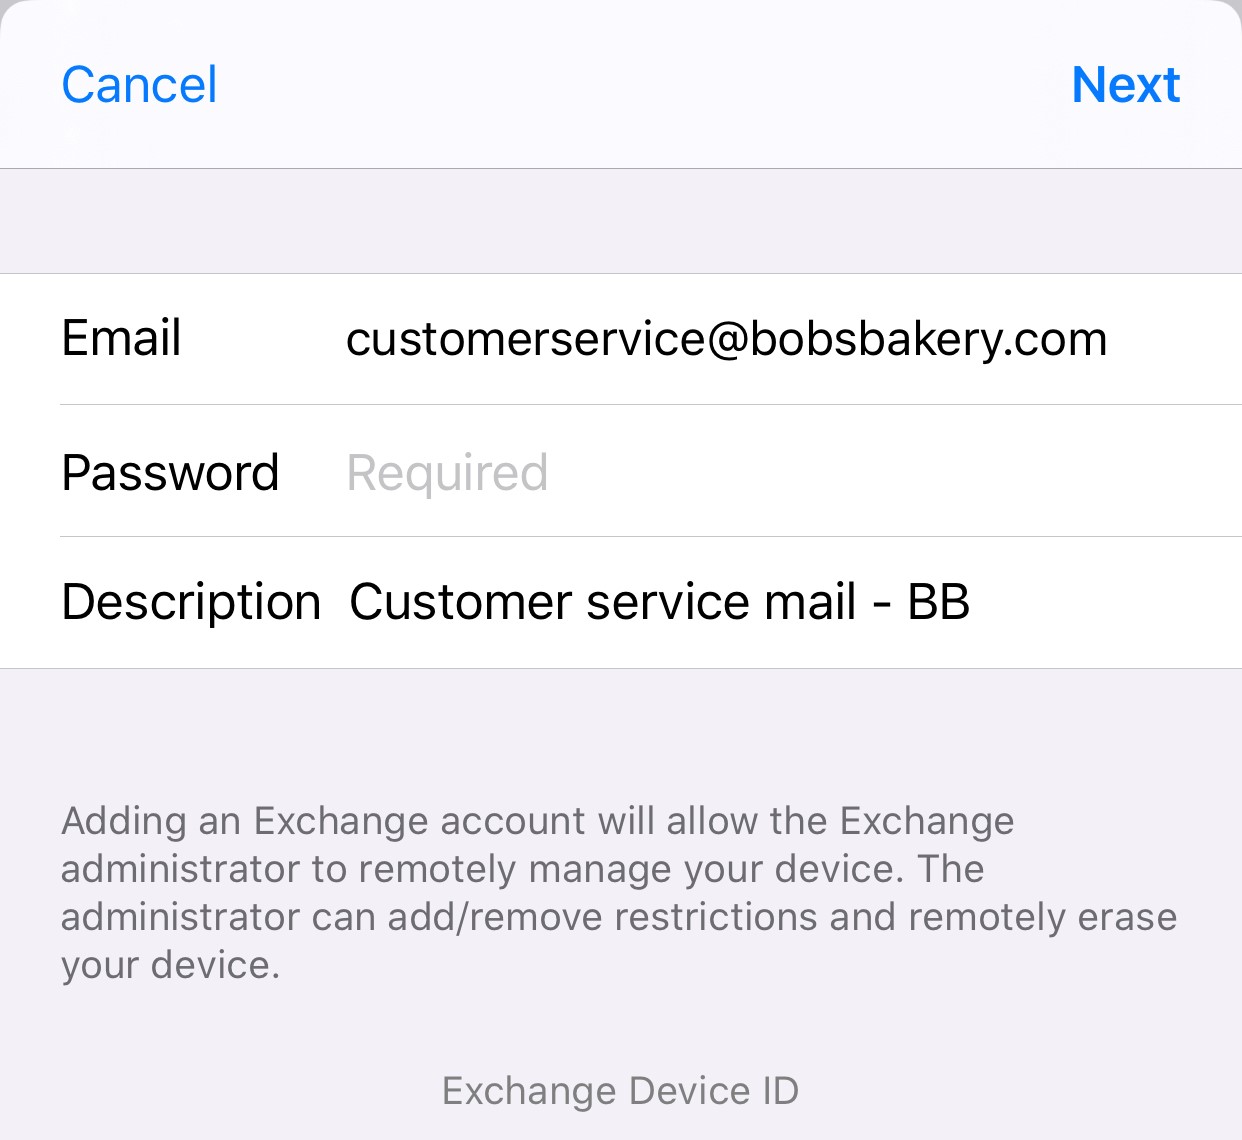
For this step you'll see two fields:
- E-mail - Will be the Email account you will be connecting to
- Description - Will be the Name the email account and will be displayed with the given name within your list of e-mail accounts.
Enter your Office 365, Exchange, or Outlook.com email address and a description of your account. Then tap "next" to continue the process.

STEP 4
A pop up window will appear asking you to select one of two (2) Options:
- ) Sign In - This Option is for accounts that are setup directly from the server and is ready to connect.
- ) Configure Manually - This option will allow you to enter all credentials manually and ensures accurate information is provided. (Recommend Selecting)
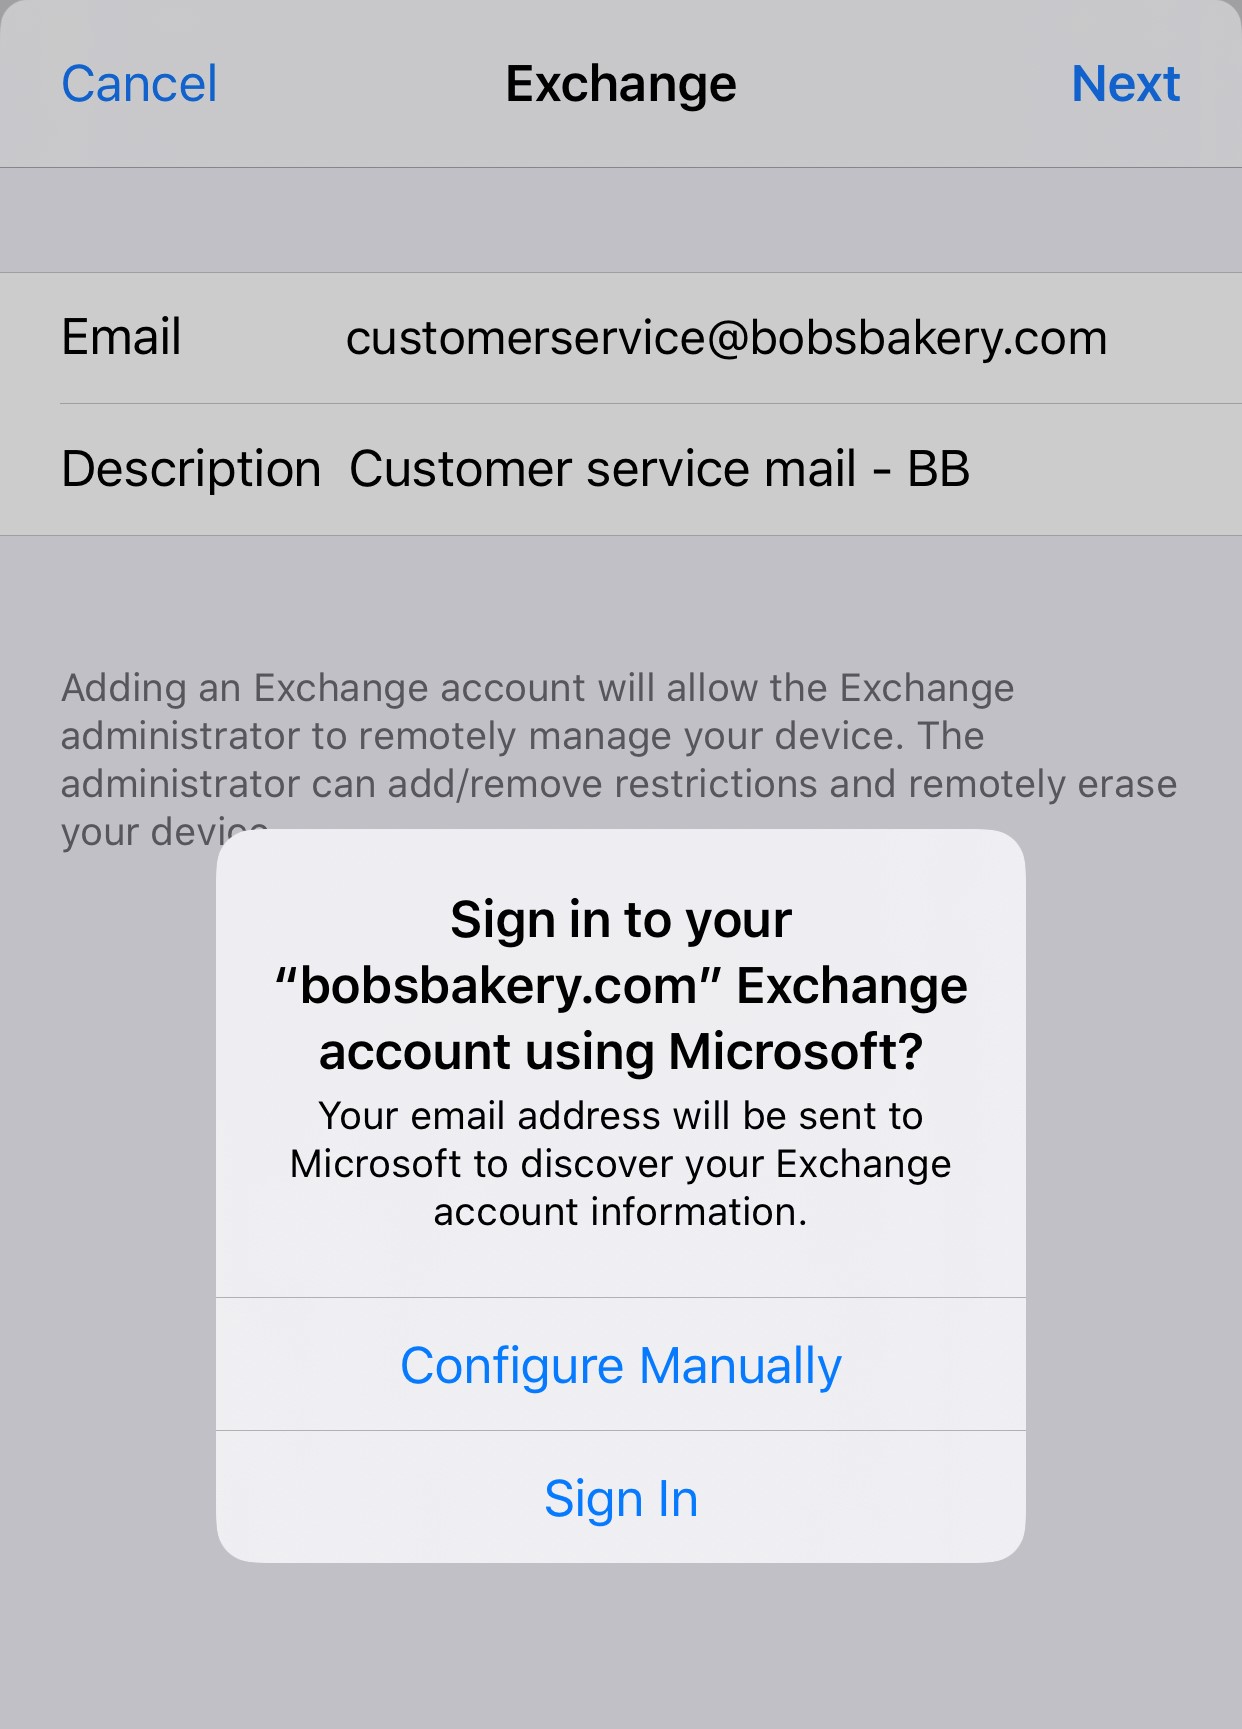
It is recommended that you select option 2 (Configure Manually). After selecting this option you will prompted to enter in the account "Password." Enter in the password and select "Next."
STEP 5
In the next window you will presented with the following fields:
- E-mail: This field contains the Email address you are currently settings up. This field should be already populated with the Email address account, if not enter in the Email account.
- Server: This field is for the server you are going to connect to, this will allow you to send and receive messages from your assigned server address.
- Domain: This field is for the domain name (example: @bobsbakery.com) that will used for all Email address.
- Username: This is the Username/Email address used to access the account.
- Password: This is the password used to access the Email account.
- Description: The description of the Email account being added.
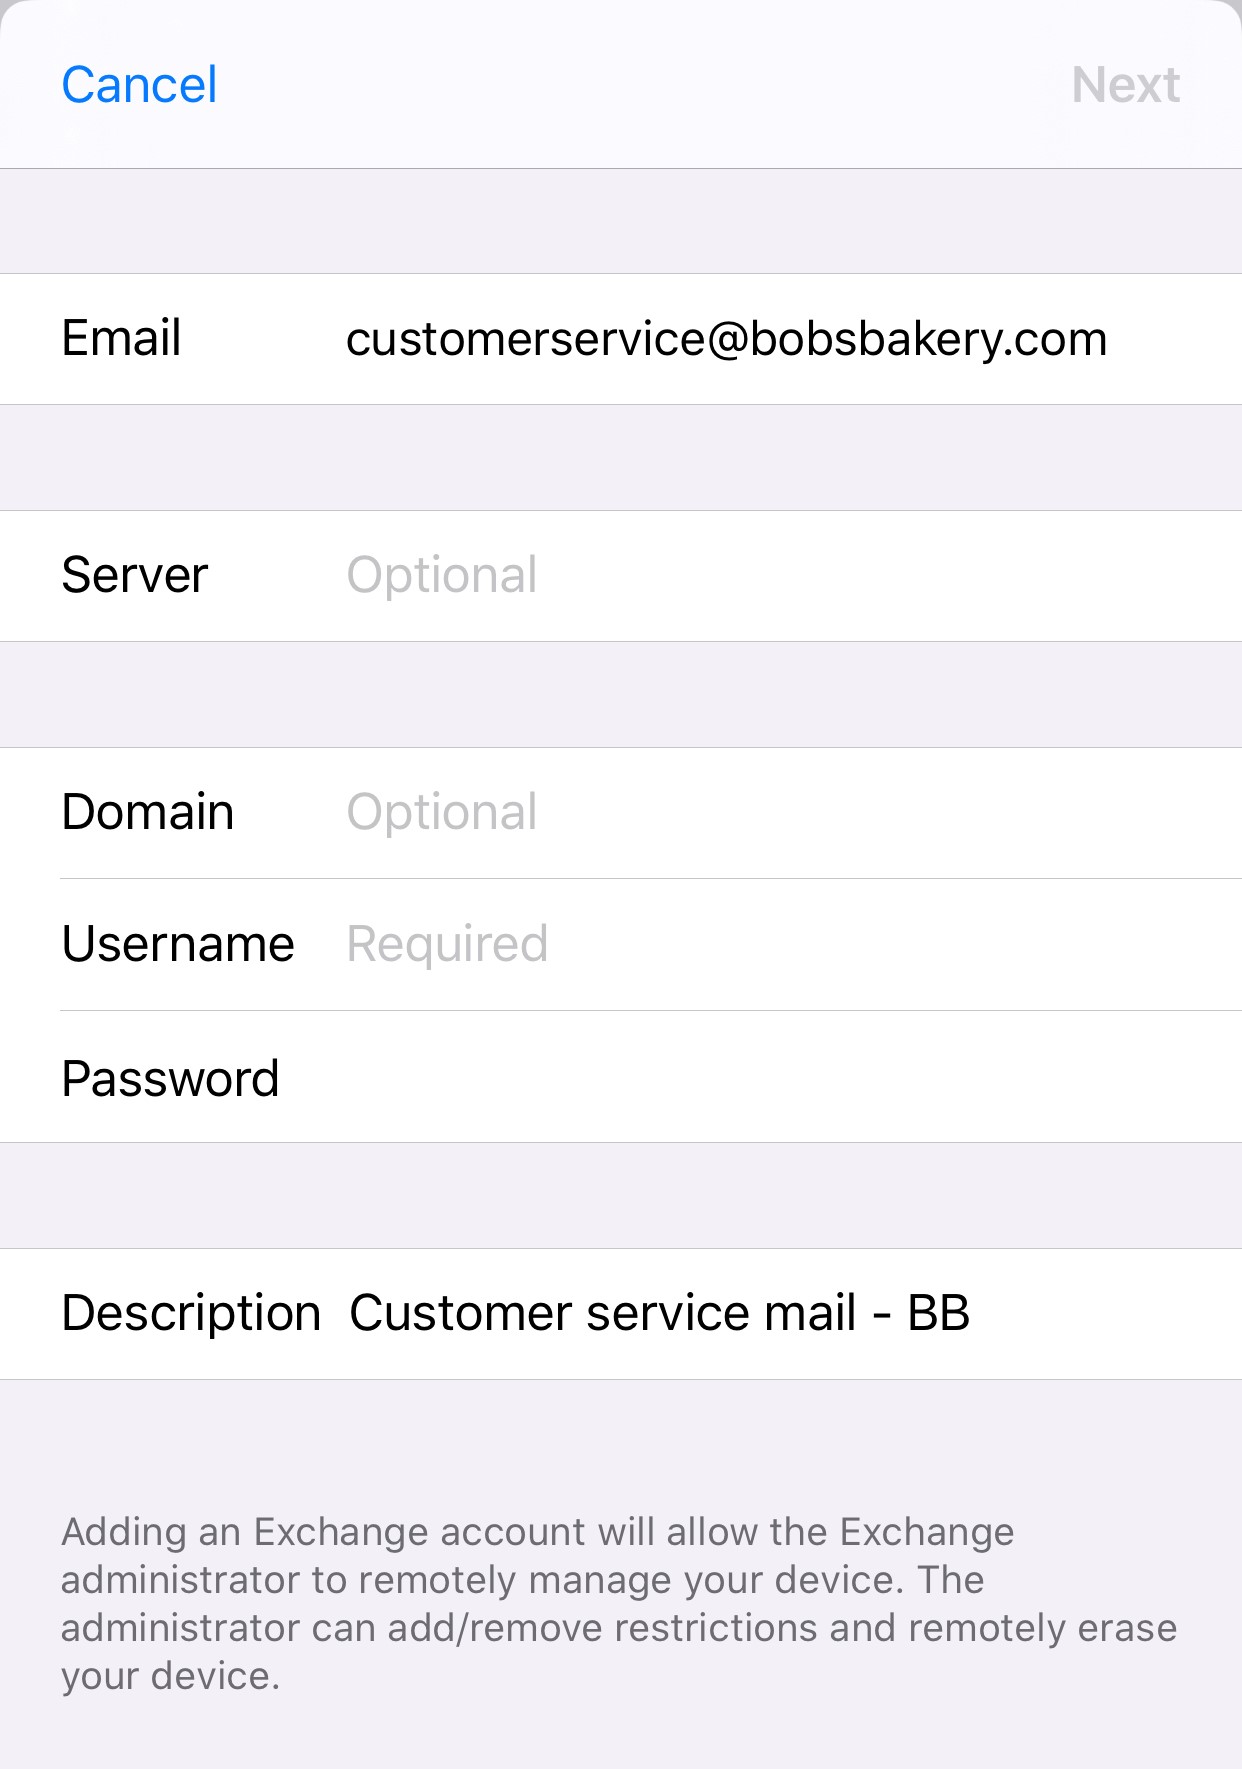
For this step you will need to focus only on the following fields: Server, Username & Password. Enter in the "Server" address provided you by our support staff - If the server address was not provided please contact support and we will provide this for you. In the "Username" field you will be entering the Email address you are trying to connect to (example: customerservice@bobsbakery.com). Enter in the Password for the account once more to complete the process. Note: If "Email" & "Description" are not populated, please do so.
Once all the fields are populated, click on "next." If all the credentials have been entered correctly, you will notice a series of check marks along the right side of the screen, indicating successful credentials were entered. If NOT you will need to make sure all information has been entered correctly or contact support and someone will be able to assist you.
STEP 6
Upon successful connection, you will be presented with options to sync with your iOS device. The majority of people select "Mail" & "Calendar". However, it completely up to you, tap Save. You're done!

