- Open Outlook.
2. Click the Tools menu, and select E-mail Accounts...
3. Click Add a new e-mail account, and click Next.
4. Choose POP3 as your server type by clicking the radio button, and click Next.
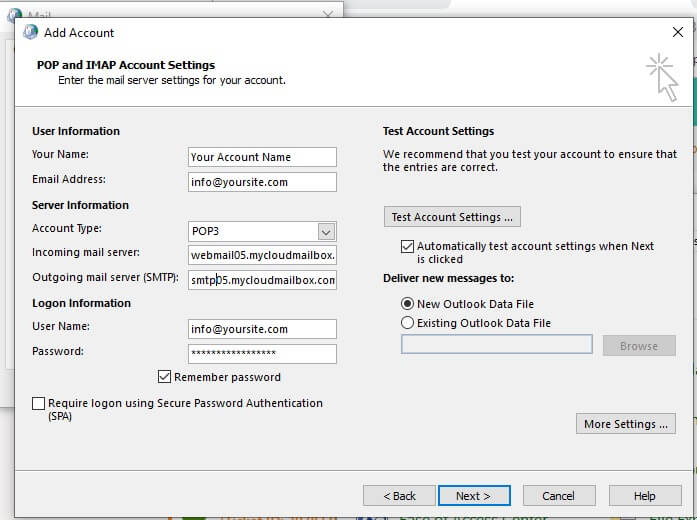
5. Fill in all necessary fields to include the following information:
User Information
Your Name: Enter your name as you would like it to appear in the From: field of outgoing messages.
Email Address: Enter your full email address (email@company.com)
Server Information
Incoming mail server (POP3): mail.yourdomain.com (webmail05.mycloudmailbox.com)
Outgoing mail server (SMTP): mail.yourdomain.com (smtp05.mycloudmailbox.com)
Login Information
User Name: Enter your email address
Password: Enter your password
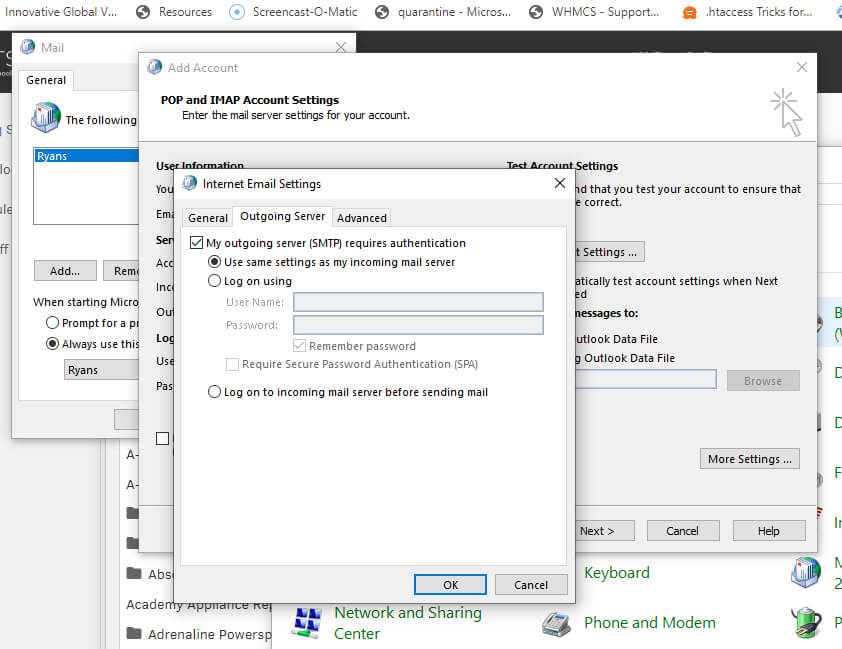
6. Click More Settings... and then click the Outgoing Server tab.
7. Check the box next to My outgoing server (SMTP) requires authentication and select "Use same settings as my incoming mail server."
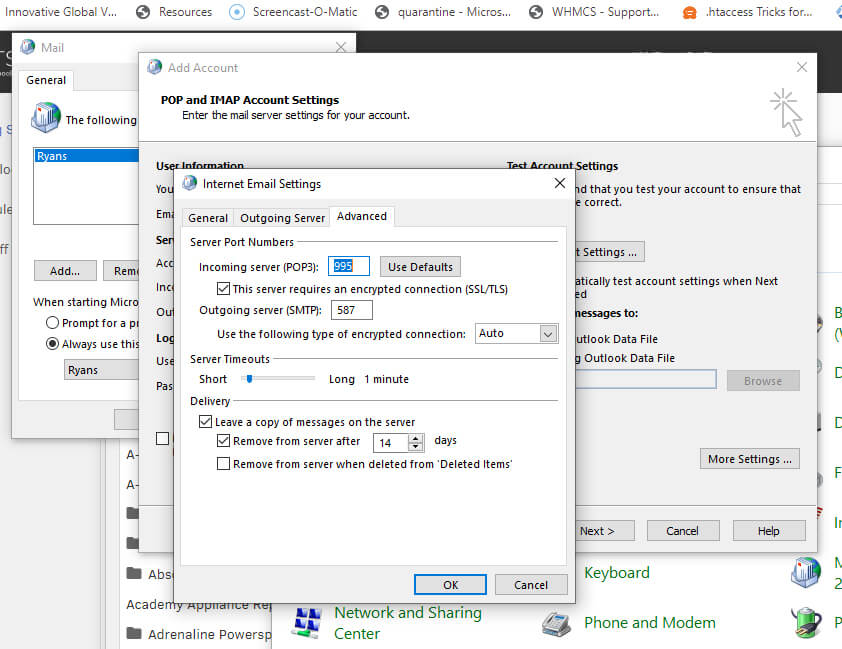
8. Change the Incoming Server (SMTP) port number to 995
-Check the box next to "This server requires an encrypted connection (SSL/TLS)"
9. Change the Outgoing Server (SMTP) port number to 587
-Select Auto under "Use the following type of encrypted connection"
10. Click OK.
11. Click Test Account Settings... After receiving Congratulations! All tests completed successfully, click Close.
12. Click Next, and then click Finish.
IMAGE BASED STEP BY STEP
Step 1:
Step 2:
Step 3:
4.) Test account settings and then click next. That's all!
