Adding a new item to your navigational list
If you just created a new page and would like for it to appear within your main navigational menu, here are the steps to achieve this:
Note: Prior to adding a new page to your navigational menu you will need to make sure the page is set to “Publish.” If it is left on “Daft” it will not be available to select in the steps below.
- Log into the back end of your website
- On the left side of the screen locate the “Appearance” tab, hover over this and then select “Menus”
- At the top of this page you will find a “Dropdown” menu, this dropdown list will allow you to select a menu you wish to edit. Make sure you are selecting the appropriate menu by looking for the following naming convention Top menu (Primary Navigation). Once selected click on “Select” to confirm. If you’re having issue with this, please contact us for assistance.
- Below this you will find two columns, the LEFT column allows for selecting a variety of content to include into your navigational menu. The RIGHT column you will find the menu name and the structure of your navigational menu.
- From the left side column browse the “Pages” widget to locate the page you JUST CREATED. If you do not see your page, please make sure it’s PUBLISHED. You can click on the “View all” or Search tab to locate your page if you don’t see it from the list.
- Once you locate your page select it and click “Add to Menu”
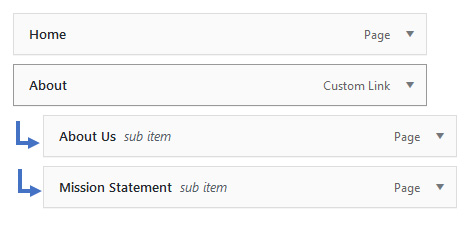
- Your new page will be added to the bottom of the list on the right-hand side. From here you can “Drag and Drop” the page in the appropriate location in the navigational menu.
- Each indentation means that it will be a sub child of that parent menu - basically creating a “dropdown” menu for that list.
- Once you are finished click on the “Save Menu” to complete the process.
- Visit the front page of your website to see the results. You’re DONE!
