For this tutorial we will be showing you how to post a NEW blog using your WordPress Website
Step 1
Log into the back-end of your website. If you need assistance accessing the back-end of your website please contact Support or browse our guides.
Step 2
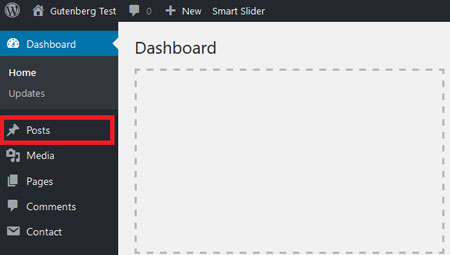
Once you login, locate the "Post" link located to the left of your screen, select this to see your listings of blog posts, create a New blog post, and more.
Step 3
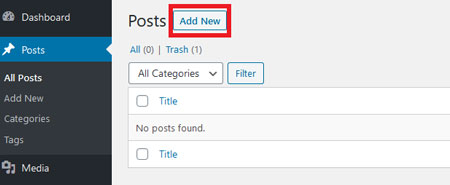
Click on the "Add New" button located at the top of the screen to begin creating a new blog post.
Step 4
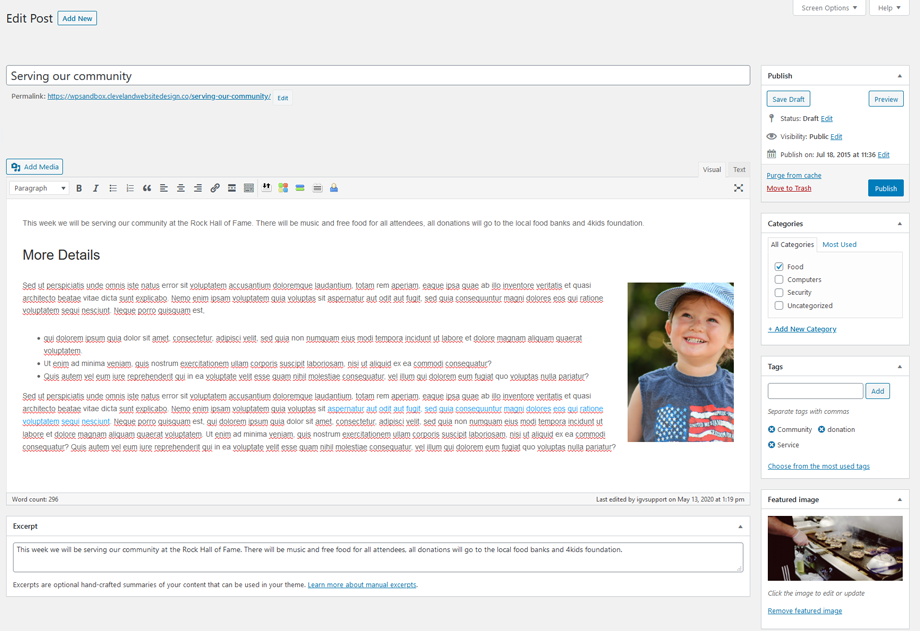
You are now going to start creating your new blog post. Within this screen you will notice several area's for you to populate.
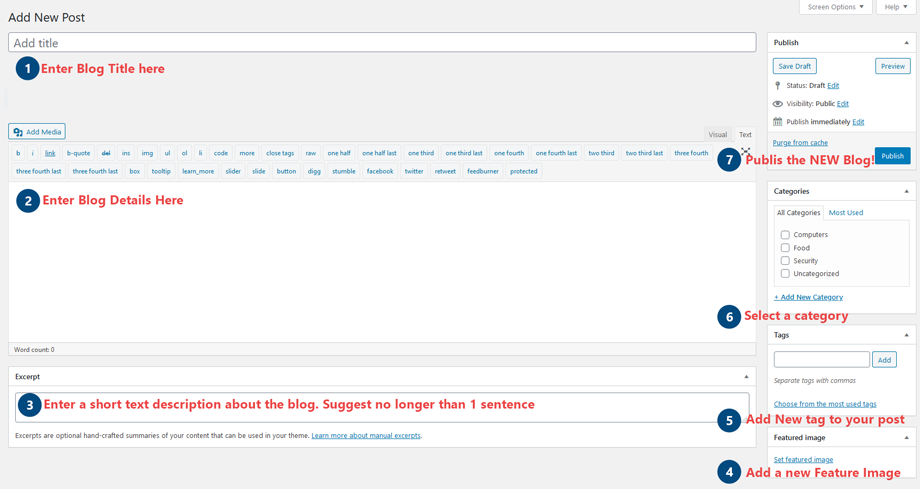
1.) Blog Post Title - Enter the title/name of the blog.
2.) Main Body Content - Enter the complete content of your blog. Make sure to have the "Visual" tab selected (located at the far top right of the content box) for a more user friendly experience.
3.) Excerpt - For this area you will be adding a one (1) to two(2) sentence introducing the content of this blog.
4.) Feature Image - Here you can add a feature image to go with your blog post. This is optional and you select an image from existing images that you previously uploaded or upload a new image.
5.) Tags - You can include tags that identify the subject or topic of the post. If you filled out this area from a previous blog post, you can select the existing tags by clicking on them. You can add individual tags by using commas (,) example: trees, oakwood, lumber
6.) Categories - Here you can either create a new category that relates to the blog post or select from preexisting categories. Based on the way your website was built you may need to select multiple categories in order for the post to properly display in specific areas of your website.
7.) Publish - Once you are ready to publish your post live you can either review the content by clicking on the "Preview" button or go live by clicking on the "publish" Button. Additional options:
- Save Draft - if you are not ready to post the blog live, you can select "Save Draft" to save it as a draft and publish it at a later time.
- Status - You can select the option to control the publish state of the blog post to either: Draft or Pending Review.
- Visibility - In this option list you can select a level of visibility: Private (no body but logged in users can see), Password Protected (nobody can view the post unless they have the provided password created by the admin), Public (anyone can view the post)
- Publish on - You can select to have the blog post publish "Immediately" or select a date for it to be published LIVE
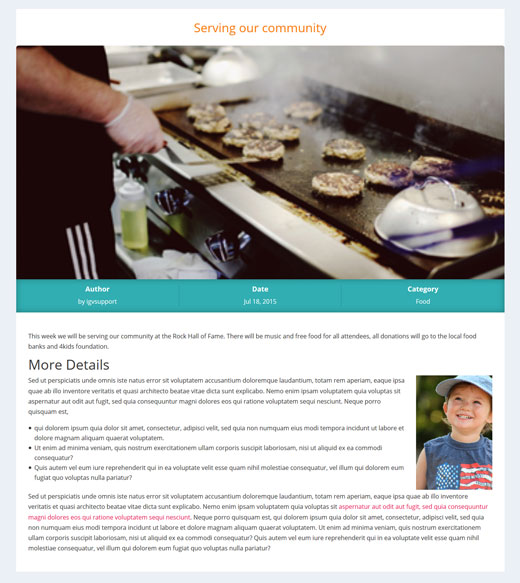
Example of a complete blog post
Example of published blog post